Email campaigns are a great way to reach a large group of people and keep them engaged with your brand. They are also an effective way to learn about your target audience and create content that will resonate with them.
An email campaign is an email that you send to a list of recipients or a specific segment — think of regular newsletters, welcome emails, sale announcements, or promotional sends. An individual campaign can be created and sent immediately; or scheduled to send at a later time.
How to Create Email Campaigns
- From the sidebar menu, select Campaigns.
- Go to the top right corner of the page and click “New Campaign”.
- Choose the campaign type you want to create, in this case, email.
-
Give your campaign a descriptive name and select “Get Started”.

How to create a new email campaign -
Choose your recipients and click Continue to Content. (Your campaign can be sent to all contacts or a particular segment.)

Choose a recipient for your campaign -
Add the Email Subject and the Preview Text for your email.
-
Subject Line
Add an email subject line that immediately grabs readers' attention. You can use merge tags to personalize them with details from your subscribers' contact information. The most common merge tags in the subject are:
- {{first_name}}
- {{last_name}}
-
Preview Text
Preview text is the short copy that displays next to or below the subject line. It is a teaser that gives more info about the email, working in tandem with the subject line to persuade subscribers to open your message.

Add an email subject and a preview text to your email
-
Subject Line
-
Click Email Types to choose the type of email you want to create. There are your three options:
-
Text-Based
Plain text emails use a basic font, have no design elements or colors, and are devoid of any formatting.
-
Drag & Drop Editor
Our intuitive drag-and-drop editor makes it easy to create professional-looking emails quickly. Choose from our library of email templates, or create your own from scratch.
-
Custom Code
Write your own HTML code to create an email that's unique to you.
-
Text-Based
-
Craft your content and click Continue to Review when done.
- When crafting your email content, you have certain dynamic merge tags available to you in order to further personalize your email campaigns. See a complete list of merge tags here

Select which type of email you want to create and craft your content - Review and confirm the content you created. Click Continue to Schedule when done.
-
Send or schedule your campaign.
- To send immediately, in the Send Now tab, click Send Campaign.
-
To schedule the campaign, go to the Schedule for Later tab, choose the time and date you want to send it out, and click Schedule Campaign.

How to send your campaign immediately 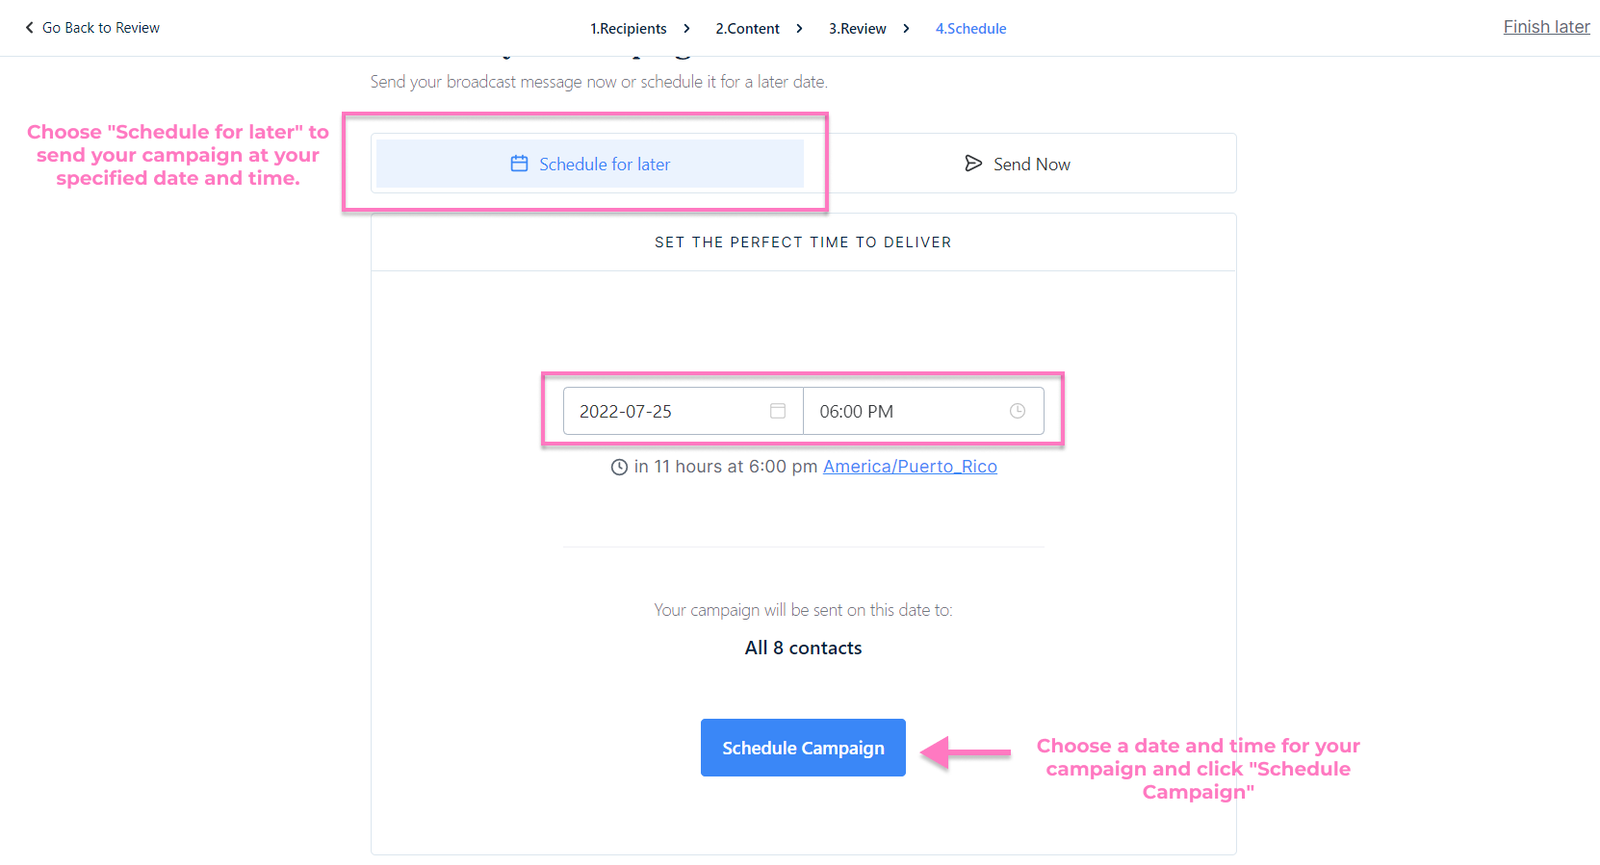
How to schedule your campaign