Before you launch your marketing campaigns, it is important to verify your custom email address first. Verifying it allows you to send emails from your own domain via our email delivery service partner, Postmark.
Otherwise, we'll send your emails from a shared address (hi@amplf.io) we use across our customer base. Thousands of stores share this email, so it might not have the highest open rate.
Using a Custom Email Address
For starters, you need to have an email address that contains the domain of your store. By using an email address such as name@yourdomain.com, you can improve your emails' inbox placement, which positively impacts the performance of your emails.
How to verify my email address in Amplified
Here are the 6 simple steps to verify your email address with Amplified:
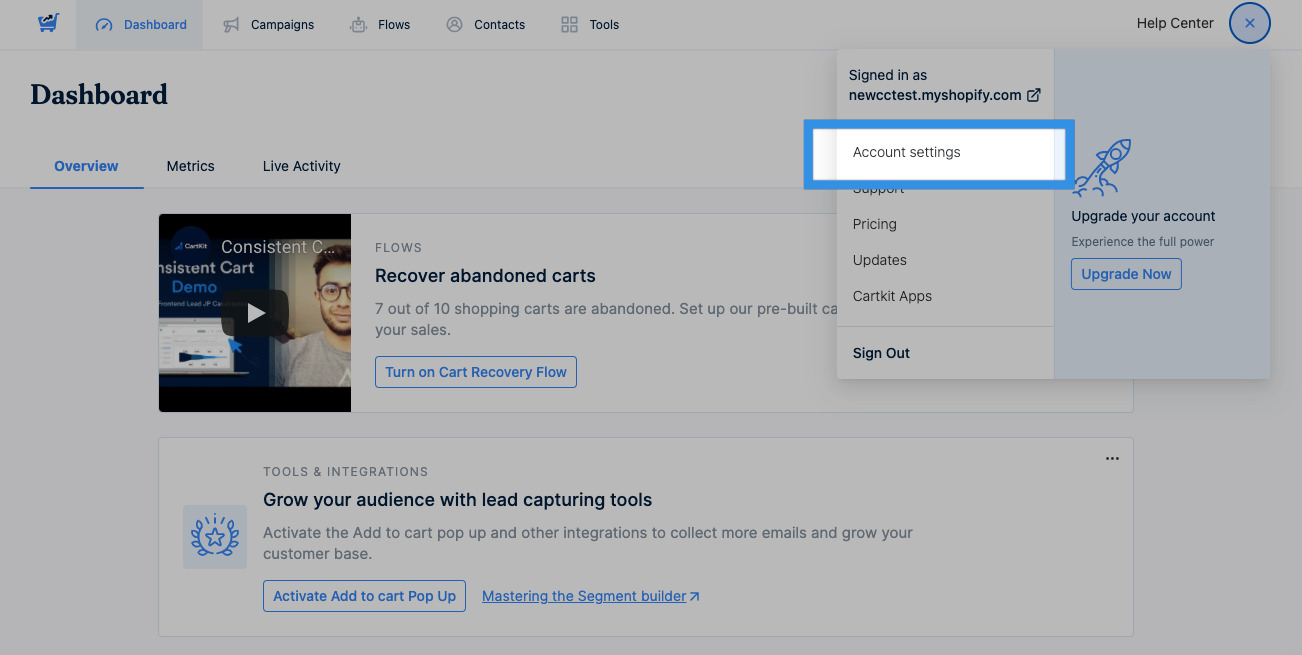
- From the sidebar menu, select Settings > Email.
- In the “From Email” section, enter your custom email address. For example, hello@myshopname.com. This will be the email address your recipients will see in the “From” field.
-
In the “Reply to Email” section, enter the custom email address your customers can reply to. This can be the same as the “from” address or a different one if needed.

How to navigate to the Email Settings page and add email information -
Go to the Email Verification tab and click on “Verify Now”.
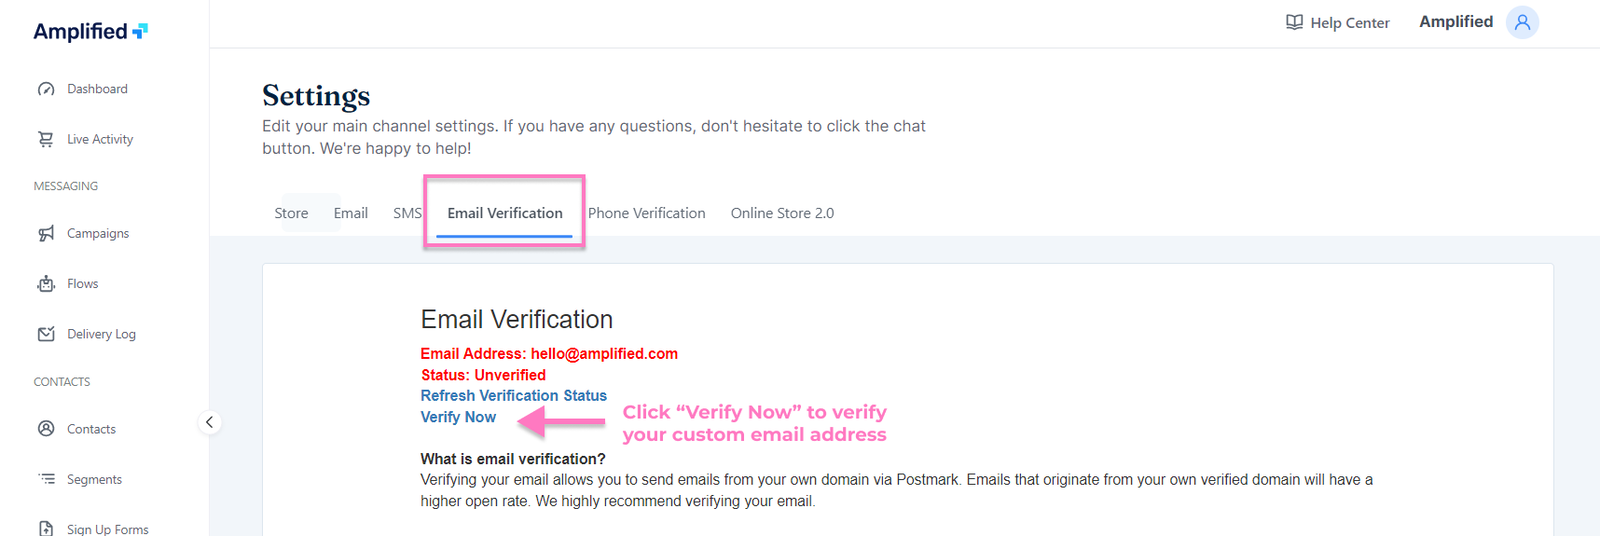
How to verify your email address -
Postmark, our email delivery partner, will send you an email to confirm the Sender Signature. The email will look like the one shown below, and you will have to click Confirm Sender Signature to confirm your email address. If you don't see it in your main inbox, you may need to look in your spam folder.
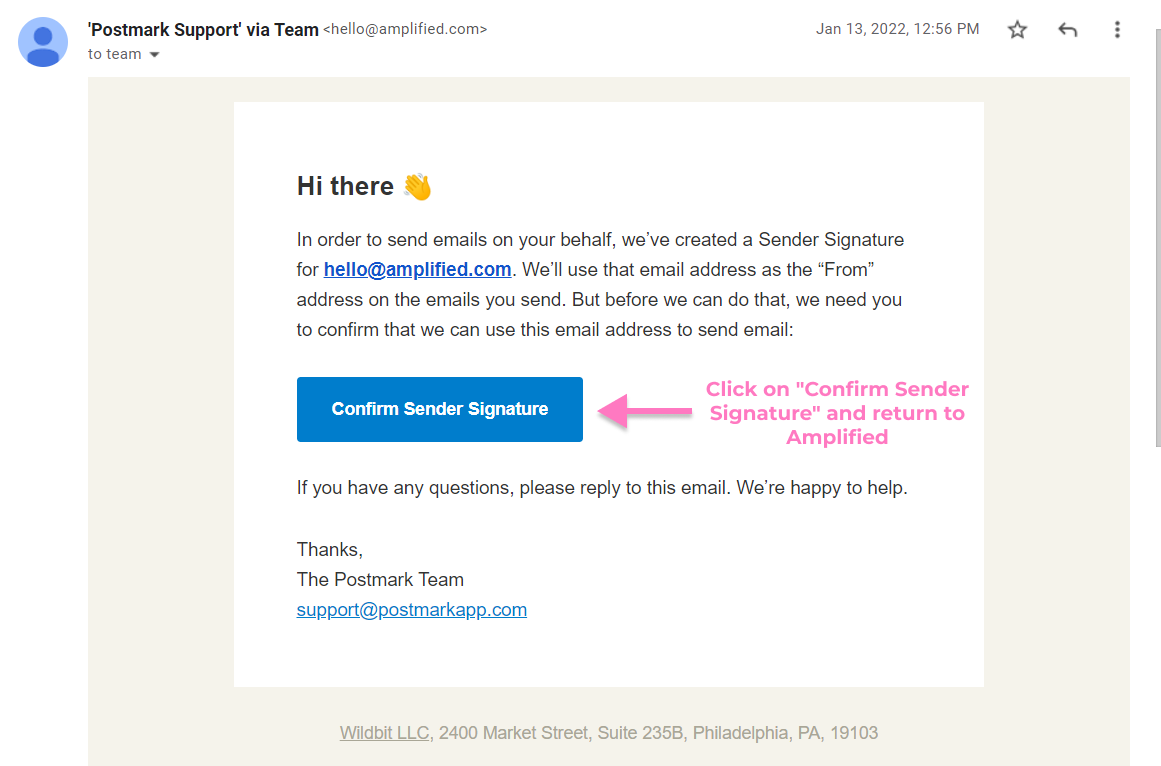
How to confirm your sender's signature in an email from Postmark -
Return to your Amplified dashboard and either click the Refresh Verification Status or refresh the page.
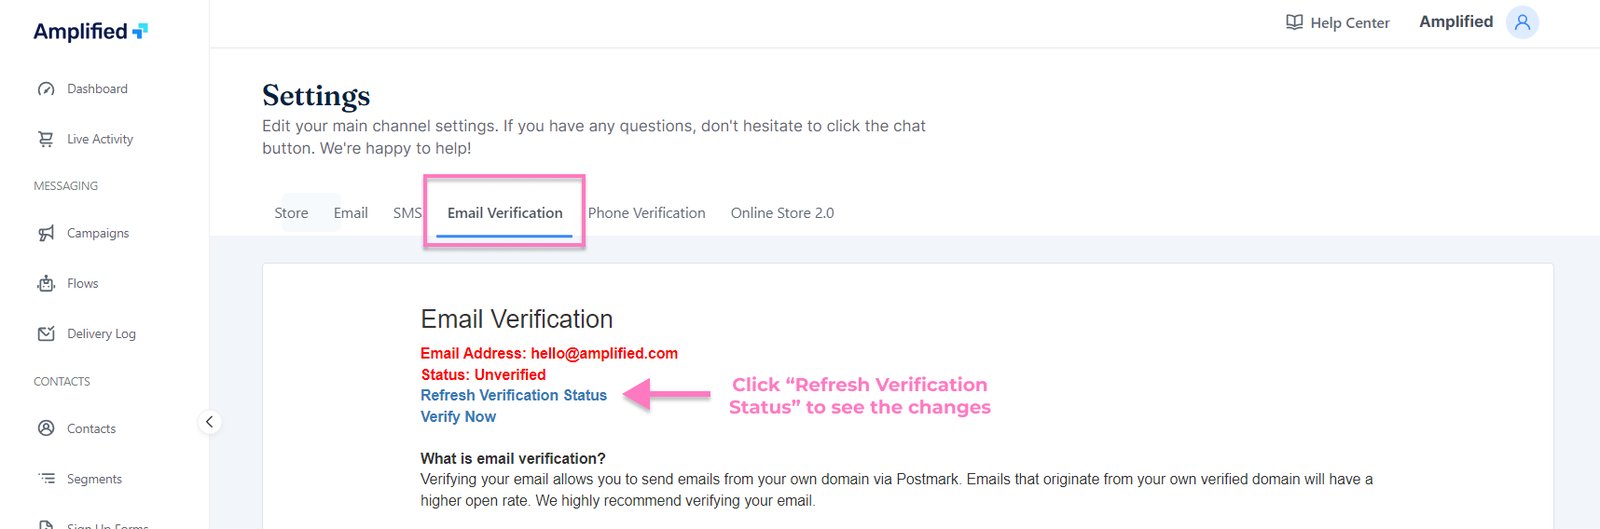
How to refresh the verification status
We are happy to answer any questions you may have, so feel free to reach out to our support team via in-app chat or by email at hello@amplified.io.